Temperature Matters: Meat Thermometer Guidelines
Where to Put the Thermometer in a Turkey
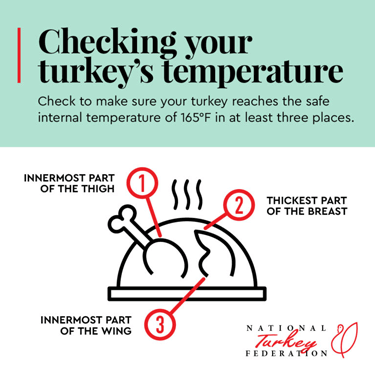
An important part of using any thermometer is the proper placement in the turkey. Unsure of where to put the thermometer in a turkey? Here are few tips to keep in mind:
- When preparing a whole turkey, insert the thermometer into the thickest portion of the turkey breast, the innermost portion of thigh and the innermost portion of the wing.
- Make sure the thermometer does not touch bone, gristle or the pan.
- When inserting the thermometer in a turkey breast or ground turkey patty, insert it from the side. The thermometer is easier to read and more accurate than when inserted from the top.
Measuring Internal Temperature
The internal temperature of your turkey (and any stuffing) should always reach 165°F.
According to the U.S. Food and Drug Administration, the percentage of consumers who own food thermometers has increased from 49 percent in 1998 to 70 percent in 2010. Both the National Turkey Federation and USDA recommend using a meat thermometer to ensure a delicious and safe meal.
Accurate temperatures, both in the oven and the turkey are important for quality and safety. A meat thermometer is a cook’s best friend when it comes time to prepare a meal.
Meat thermometers that can be calibrated for accuracy and instant-read/digital thermometers are our preferred choices. These types of thermometers are available at grocery, kitchen and hardware stores.
Don’t forget about your oven’s temperature! Check the oven thermostat and oven temperature to verify the oven setting. Recalibrate if necessary – a 25°F variation can make a 5 percent difference in cooked turkey yield. An oven that is too hot will dry and shrink the bird.
Check out USDA’s resource for more information on proper cooking temperatures.
Types of Thermometers
Oven-proof Thermometer
This should be inserted into the turkey at the beginning of the cooking time and remain inserted in the bird while cooking. The temperature indicator will rise slowly as the turkey cooks. An oven-proof thermometer is ideal for the whole turkey and the turkey breast.
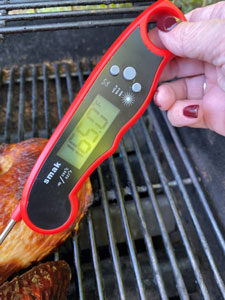
Instant-read and Digital Thermometers
These thermometers enable you to measure the internal temperatures of meat with the most accurate reading in the quickest time possible. They are not designed to stay in the food during cooking. If you use this type, pull the turkey out of the oven far enough to insert the stem about 2 1/2 inches into the thickest part of the meat, but not touching bone or the roasting pan.
Pop-up Thermometers
The sensing tip is a small indentation located about 1 1/2 inches from the end of the stem and must be fully inserted into the bird. (Look for a tiny dimple on the stem.) The temperature should register in about 15-20 seconds. Wipe with a sanitizer after each use and before the next use.
These are commonly found in the whole turkey and turkey breast. The “pop-up” thermometer device indicates the turkey has reached the final temperature for safety and doneness. Experts suggest the temperature be verified with a conventional thermometer.
USDA has a full listing of the various types of food thermometers available.
Clean/Sanitize Your Thermometer
Food thermometers should be washed following use with hot soapy water and sanitized. Most thermometers, particularly digital and instant-read varieties, should not be immersed in water.
There are several ways to sanitize your thermometer:
- Use an alcohol swab to wipe the stem.
- Use a food-safe sanitizing solution, such as chlorine bleach and water, diluted according to the directions on the bottle, by holding it in the diluted mixture for a minimum of 10 seconds.
- Hold the stem in boiling water for no less than 30 seconds.
If using alcohol or a cleaning solution, make sure to wash the stem with soap and hot water to remove any residue.
Check for Thermometer Accuracy
The accuracy of your thermometer should be verified and the thermometer calibrated. Ideally, these thermometers should be calibrated when first purchased as well as checked for accuracy regularly. Accuracy can be altered if the thermometer has been exposed to extreme temperature changes or has been dropped. There are two simple ways to test for accuracy.
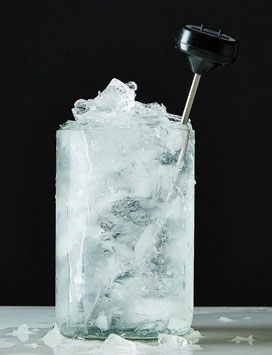
Ice-Point Method
In a cup prepare a 50/50 mixture of ice and water to form a water slush. Place at least two inches of the thermometer stem into the cup, making sure the sensing tip is fully inserted. The tip should not touch the bottom or side of the cup.
Wait about five minutes or until the needle is steady and verify the needle registers 32°F. If the needle does not register 32°F, an adjustment should be made.
Boiling Point Method
Fill a pan with about three inches of water and bring to a rolling boil. Place at least two inches of the thermometer stem into the water, making sure the sensing tip is fully inserted. Use caution to avoid burns. The tip should not touch the bottom or side of the pan.
Wait about one minute or until the needle is steady and verify the needle registers 212°F. (NOTE: Water boils at a lower temperature at higher altitudes, for example, 202°F at 5,000 feet.) If the temperature does not reach the boiling point, an adjustment should be made.